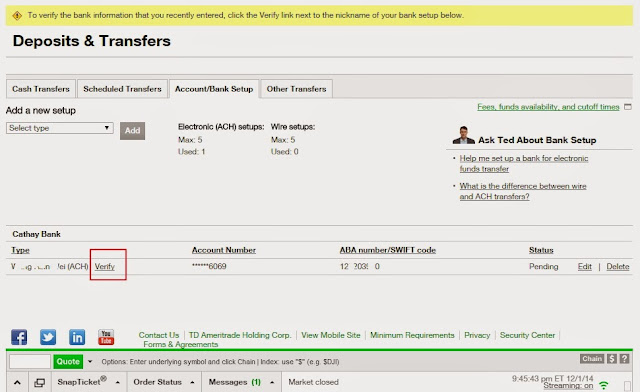
再來就進入真正輸入銀行資料、ABA號碼、帳戶名稱、及帳號的頁面: 依序填入以下資料 : Name for this setup Bank name Bank city Bank state ABA number Bank account number Name(s) on account Account type — 選 Checking
The Daily Checklist not only helps you keep track of your daily ClixSense activity it also rewards you for being an active ClixSense member.
For each day that you complete your Daily Checklist, a bonus of up to 16.0% will be added to your account balance at the end of that day. The bonus amount you can earn is unlimited; it only depends on your activity.
This bonus will be calculated from your total personal earnings that include your completed Figure Eight Tasks and completed Offers and Surveys. Other bonuses and referral commissions are not included. Video Offers and Kiip rewards are also not included.
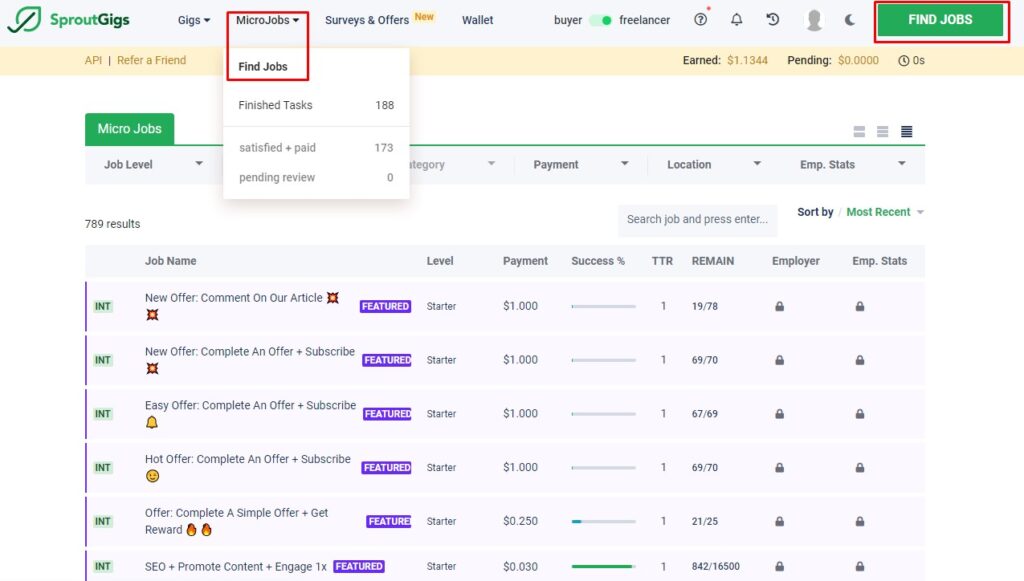
In order to complete the Daily Checklist you need to:
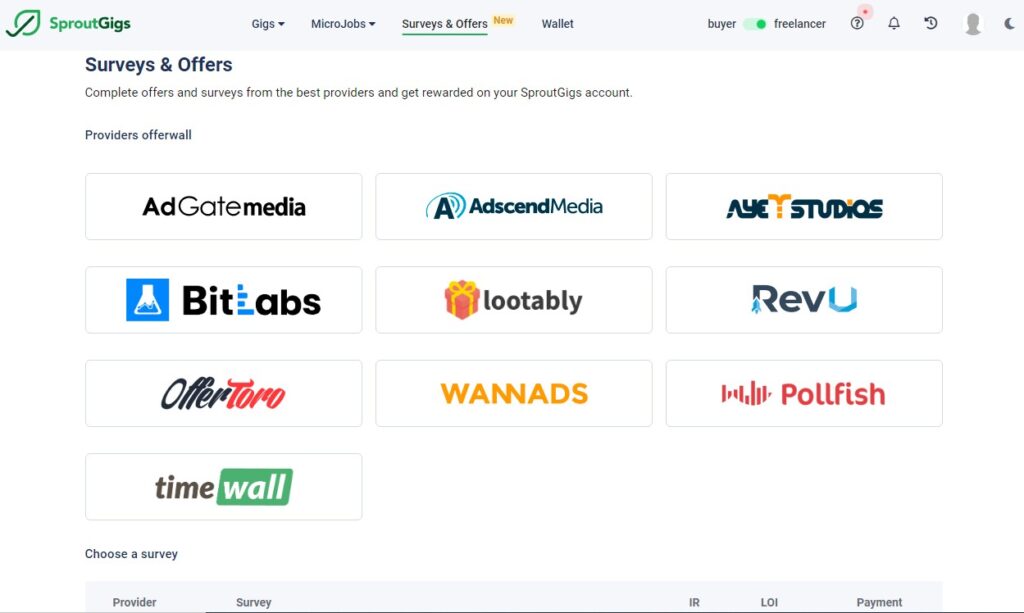
Complete at least 2 offers or surveys from the offers and surveys pages; or
Complete at least 5 Figure Eight Tasks and at least 1 offer or survey from the offers and surveys pages;
每日完成以下3項,最高額外獎金:帳戶餘額16% (獎金沒有上限限制)
Daily Checklist Bonus
12.0%
ClixAddon Extra Bonus ¹
2.0%
Activity Extra Bonus ²
2.0%
Maximum Possible Bonus
16.0%
¹ ClixAddon Extra Bonus: Complete the checklist and run the ClixAddon for at least one hour in a given day to earn this extra bonus. Important: Survey notifications must be enabled under options. 前提是完成每日checklist,當然不要關閉ClixAddon(每日至少開啟1小時以上,一般是不會關掉/移除才是)
² Activity Extra Bonus: By completing the checklist three days in a row you will earn this extra bonus on the third day, for that day’s earnings, and every other day thereafter given that you complete the checklist continuously. If you fail to complete the checklist in a given day the bonus will reset. Take the following table as an example:
If for some reason you do not get credit for completing a Task, Survey or Offer on a given day, or if payment is delayed into a following day, the checklist of that day will not take the missing credits into consideration; payments are not retroactive, they will instead count only towards the day when they are actually received.
There will be slow days, with not enough Tasks, Surveys or Offers. You may or may not be able to complete your checklist in such days. We cannot be held responsible for this.
These conditions may change at any time and an announcement will be made in that event.
chrome flags chrome flags chrome setting chrome flags enable chrome flags android chrome flags chrome flags menu chrome flags ash debug shortcuts chrome flags experiment chrome flags enable site per process chrome flags enable tab grid layout
Chrome Flags allows you to customise many advanced feature options in Google Chrome. Currently, this service is still in experimental mode, so you can choose to ignore it entirely if you prefer. However, some experimental options are worth enabling, but you should be careful as enabling certain options can cause Google Chrome to crash and quit unexpectedly.
This article will share Chrome flags that are worth enabling after testing. We recommend enabling 10 of these features. Let’s take a look!
What are Chrome flags
Chrome Flags are experimental features and settings in the Google Chrome web browser that allow users to customise and enhance their browsing experience. These flags provide access to advanced options that are still in development or testing. While they have the potential to improve performance, security and functionality, they can also be unstable or cause problems in some cases.
Users can access Chrome Flags by typing “chrome://flags” in the address bar and pressing Enter. This will open a hidden settings page where you can enable, disable or modify various experimental features.
It’s important to note that Chrome Flags are not intended for casual users and can affect the stability of your browser. So it’s a good idea to use them with caution and only enable flags that you understand and believe will benefit your browsing experience.
Some popular Chrome flags include options to improve page loading speed, enhance security, enable dark mode for websites, and more. However, the specific flags that are worth enabling may vary depending on your preferences and needs. It’s a good idea to research each flag before enabling it, and to keep an eye on Google’s updates and changes to ensure a smooth browsing experience.
Chrome flags are experimental features that allow users to customize the behavior of Google Chrome. While some flags can be helpful, others may cause stability or security issues. It is important to research flags before enabling them and to disable any flags that cause problems.
Here are some of the things you can do with Chrome flags:
Test new features that are not yet released to the public.
Customize the appearance and behavior of Chrome.
Improve performance or security.
It is important to use Chrome flags with caution. Some flags may cause instability or security issues. Before enabling any flags, it is important to understand their function and potential risks.
Here are some things to keep in mind when using Chrome flags:
Only enable flags that you understand and are willing to test.
Back up your Chrome settings before enabling any flags.
Report any problems you encounter to the Chrome team.
Here are some examples of Chrome flags:
#enable-tab-grid-layout: Enables a new tab layout that displays tabs in a grid.
#enable-reader-mode-on-all-pages: Enables Reader mode on all pages, even those that do not support it.
#enable-experimental-web-platform-features: Enables experimental Web Platform features.
To enable Chrome flags, open the Chrome flags page by typing chrome://flags in the address bar. You can then search for specific flags or browse through the list of available flags. To enable a flag, click the Default button and then select Enabled.
To disable a flag, click the Enabled button and then select Default.
For more information about Chrome flags, visit the Chrome flags documentation.
A Chrome flag is an experimental feature that can be enabled or disabled to change the behavior of Google Chrome. Chrome flags are not yet fully developed or tested, so they may cause instability or security problems. However, they can also be used to test new features before they are released to the public or to customize the behavior of Chrome to meet your specific needs.
To access Chrome flags, type chrome://flags in the address bar and press Enter. This will open a page where you can browse through a list of all available flags. To enable or disable a flag, click the dropdown menu next to it and select Enabled or Disabled. Once you have made your changes, click the Relaunch button to restart Chrome.
Here are some examples of Chrome flags:
#enable-tab-grid-layout: Enables a new tab layout that displays tabs in a grid.
#enable-reader-mode-on-all-pages: Enables Reader mode on all pages, even those that do not support it.
#enable-experimental-web-platform-features: Enables experimental Web Platform features.
It is important to note that Chrome flags are experimental features and may not work as expected. It is also important to back up your Chrome settings before enabling any flags, so that you can restore them if necessary.
Chrome flags, which improve your browsing experience exponentially.
Show autofill predictions This flag shows Chrome’s autofill predictions as placeholder text in online forms.
When you arrive at a signup or other form, Chrome offers autofill to save you typing the same email address, name, and postcode you use in a zillion forms. This flag means that when the form appears, it’s automatically filled in without you having to type anything.
show-autofill type predictions
Freeze and discard tabs This flag replaces the Automatic Tab Drop flag. If you’re in the habit of leaving multiple tabs open, this flag is for you: it keeps them open, but stops them using memory.
Normally, Chrome treats each tab as its own little program, which you can see in your Task Manager. This “tablerone” is a memory and CPU hog. But with Tab Freeze and Discard, you can keep as many tabs open as you like and still see their contents without sacrificing memory. They ‘wake up’ when you navigate or interact with them. IF you have a tab addiction, enable this Chrome flag.
proactive-tab-freeze-and-discard
Parallel Downloading Parallel downloading creates three separate download ‘jobs’ to speed up the download of large files. Enabling this flag can make large file downloads much faster.
enable-parallel-downloading
Enable QUIC In most cases, what’s fast isn’t secure, and vice versa. Even the best Chrome VPNs slow things down a bit. But Google has been working on a new protocol that combines elements of TCP and UDP that’s both faster and more secure. QUIC works by reducing the number of connection requests needed to establish a secure connection with the server.
enable-quic
Override Software Rendering List Lets you force the use of GPU acceleration even where it’s not supported, overriding the default software rendering. Useful if you want to test your application or website with GPU acceleration.
ignore-gpu-blacklist
Lazy image loading Lets you load image-heavy pages faster by forcing “lazy” image loading, which doesn’t load images until they’re about to appear on the screen.
Many websites are coded this way. But for those that aren’t, there’s no need to wait for the site’s development team to get around to it. And developers can easily test how a site would perform if it were coded this way.
enable-lazy-image-loading
Full URL display Google has stopped showing full URLs for websites in Chrome 76. It now truncates “trivial” subdomain stuff like m. and www. and prefixes like https://. The search bar will only show the website name and folders.
Depending on what you do, this can be annoying for a number of reasons. It hides the URL of the site you’re visiting. Are you on the www. version or not? For developers and SEOs, this is very important. And if you want to copy the URL, you automatically get the whole thing – prefixes and all – whether you want it or not. For me, it also makes it inconvenient to search websites using the Site: parameter directly from Google.
If you prefer to see the URL without any interference, there are two flags in Chrome that allow you to do so. Note that they will eventually be deprecated.
With both Omnibox UI Hide Steady-State URL Scheme and Omnibox UI Hide Steady-State URL Trivial Subdomains enabled, you should see full URLs in your search bar. At least until Google deprecates the flags (or gives us our URLs back!).
How To enable Chrome Flags
To enable Chrome Flags in the Google Chrome web browser, follow these steps:
Open Google Chrome: Launch the Google Chrome browser on your computer.
Enter the Chrome Flags URL: In the address bar at the top, type the following URL and press Enter:arduinoCopy codechrome://flags
Access the Chrome Flags page: After pressing Enter, you will be taken to the Chrome Flags page, which lists various experimental features and settings.
Browse and search for flags: You can scroll through the list to explore available flags, or you can use the search bar at the top to find specific flags by name or keyword.
Enable or disable flags: Each flag has a dropdown menu next to it, allowing you to choose from options like “Default,” “Enabled,” or “Disabled.” To activate a flag, select “Enabled.” To deactivate it, choose “Disabled.”
Relaunch Chrome: After enabling or disabling flags, you will usually need to relaunch Google Chrome for the changes to take effect. A button prompting you to relaunch the browser will appear at the bottom of the Chrome Flags page.
Confirm changes: Once you relaunch Chrome, the selected flags will be active, and you can start using the experimental features or settings you’ve enabled.
Remember that Chrome Flags are experimental and can sometimes impact browser stability or performance. Be cautious and only enable flags that you understand and believe will enhance your browsing experience. If you encounter any issues, you can return to the Chrome Flags page and revert the flags to their default settings or disable them.
To enable Chrome flags, open the Chrome flags page by typing chrome://flags in the address bar. You can then search for specific flags or browse through the list of available flags. To enable a flag, click the Default button and then select Enabled.
Here are the steps in more detail:
Open Chrome and type chrome://flags in the address bar.
The Chrome flags page will open.
You can search for specific flags by typing a keyword in the search bar.
To browse through the list of available flags, click the Categories tab.
To enable a flag, click the Default button and then select Enabled.
Click Relaunch to apply the changes.
Here are some things to keep in mind when enabling Chrome flags:
Only enable flags that you understand and are willing to test.
Back up your Chrome settings before enabling any flags.
Report any problems you encounter to the Chrome team.
Here are some examples of Chrome flags:
#enable-tab-grid-layout: Enables a new tab layout that displays tabs in a grid.
#enable-reader-mode-on-all-pages: Enables Reader mode on all pages, even those that do not support it.
#enable-experimental-web-platform-features: Enables experimental Web Platform features.
What about Chrome settings
“Chrome Flags settings” refer to the configuration and customization options available in the Google Chrome web browser through the Chrome Flags experimental features page. These settings allow users to modify various aspects of their browsing experience and access advanced features that are still in the testing or development phase. Here’s an introduction to Chrome Flags settings:
Accessing Chrome Flags Settings:
Open Google Chrome on your computer.
In the address bar at the top of the browser, type the following URL and press Enter: chrome://flags
You will be directed to the Chrome Flags settings page, where you can explore and modify experimental features.
Customization and Features:
On the Chrome Flags page, you’ll find a list of experimental features, each represented by a flag.
These flags may cover a wide range of browser functionalities, including performance improvements, security enhancements, UI changes, and more.
Enabling and Disabling Flags:
Next to each flag, there’s a dropdown menu that allows you to select different options like “Default,” “Enabled,” or “Disabled.”
To activate a particular feature or setting, select “Enabled.” To turn it off, choose “Disabled.”
Relaunching Chrome:
After enabling or disabling flags, you’ll often need to relaunch Google Chrome for the changes to take effect. A button to relaunch the browser usually appears at the bottom of the Chrome Flags page.
Use with Caution:
It’s essential to exercise caution when adjusting Chrome Flags settings. These features are experimental and may impact the stability or functionality of your browser.
Only enable flags that you understand and believe will enhance your browsing experience or serve a specific purpose.
Keep in mind that not all flags may be suitable for everyday use, and some might cause issues or conflicts with other features.
Stay informed about updates and changes made by Google to ensure your browser remains stable and secure.
In summary, Chrome Flags settings offer advanced customisation options for Google Chrome, allowing users to explore experimental features and tailor their browsing experience to their preferences. However, it’s important to use them with care and be prepared to revert changes if unexpected problems arise.
Here are some things to keep in mind when configuring Chrome flags:
Only configure flags that you understand and are willing to test.
Back up your Chrome settings before configuring any flags.
Report any problems you encounter to the Chrome team.
Here are some examples of Chrome flags:
#enable-tab-grid-layout: Enables a new tab layout that displays tabs in a grid.
#enable-reader-mode-on-all-pages: Enables Reader mode on all pages, even those that do not support it.
#enable-experimental-web-platform-features: Enables experimental Web Platform features.
For more information about Chrome flags, visit the Chrome flags documentation.
Here are some additional tips for configuring Chrome flags:
Use the search bar to quickly find the flag you are looking for.
Click the Categories tab to browse through the list of available flags by category.
Use the Default button to reset a flag to its original setting.
Click Relaunch to apply your changes.
Here are some examples of how to configure Chrome flags:
To enable the new tab grid layout, set the #enable-tab-grid-layout flag to Enabled.
To disable Reader mode on all pages, set the #enable-reader-mode-on-all-pages flag to Disabled.
To enable experimental Web Platform features, set the #enable-experimental-web-platform-features flag to Enabled.
Chrome Flags to avoid
While Chrome Flags can enhance your browsing experience by enabling experimental features, there are some flags that you should generally avoid, as they may lead to instability, compatibility issues, or other undesirable consequences. Here are a few Chrome Flags to avoid:
Experimental QUIC protocol: This flag enables the QUIC protocol, which can sometimes lead to network issues and incompatibility with certain websites.
Enable Bluetooth: Enabling this flag might not be necessary for most users and could potentially expose your device to security risks if not used carefully.
Parallel downloading: While this flag can improve download speeds, it may also lead to incomplete downloads or corrupt files, so it’s best to leave it disabled unless you have a specific need for it.
Smooth Scrolling: While it can provide a smoother scrolling experience, this flag may cause performance issues on some systems, especially if you have a lot of tabs open.
Experimental Web Platform Features: Enabling this flag may expose you to incomplete or unstable web features, potentially leading to compatibility issues or crashes.
Enable QUIC on WiFi: Similar to the first flag mentioned, this may cause network-related problems and should be used cautiously.
Experimental JavaScript Features: Enabling this flag may introduce experimental JavaScript features that could break certain websites or web applications.
Disable Hyperlink Auditing: While this may improve privacy, it can also break some websites and features, so it’s best left at the default setting.
Enable Experimental Canvas Features: Enabling this flag may lead to issues with the rendering of web content and should be used sparingly.
Force Dark Mode for Web Contents: Enabling this flag may make some websites look strange or unreadable in dark mode, so it’s best to use the browser’s built-in dark mode feature instead.
Please note that the effects of these flags may vary depending on your specific system and the websites you visit. It’s important to understand the potential consequences of enabling any Chrome flags and to use them with caution, especially those marked as “experimental”. If you experience problems after enabling a flag, you can always return to the Chrome Flags settings page and disable it to return to the default configuration.
here are a number of Chrome flags that you should avoid enabling, as they are known to cause instability or security issues. Here are a few examples:
#enable-parallel-downloading: This flag can cause crashes and performance issues.
#enable-zero-copy: This flag can cause data corruption and security vulnerabilities.
#enable-site-per-process: This flag can cause crashes and memory leaks.
#enable-quic-dark-mode: This flag can cause rendering issues and performance problems.
#enable-experimental-canvas-features: This flag can cause crashes and security vulnerabilities.
If you are unsure whether or not a Chrome flag is safe to enable, it is best to err on the side of caution and leave it disabled.
In addition to the flags listed above, you should also avoid enabling any flags that you do not understand or that are marked as “experimental.” It is also important to note that Chrome flags can change at any time, so it is important to regularly review your settings and disable any flags that are no longer needed or supported.
Here are some tips for avoiding problems with Chrome flags:
Only enable flags that you understand and are willing to test.
Back up your Chrome settings before enabling any flags.
Report any problems you encounter to the Chrome team.
Regularly review your Chrome flags settings and disable any flags that are no longer needed or supported.
If you are experiencing problems with Chrome flags, you can try disabling all flags or resetting your Chrome settings to their defaults.
What exactly is a Chrome Flag?
A Chrome Flag, also known as a Chrome experimental flag or feature flag, is a hidden and advanced configuration setting in the Google Chrome web browser. These flags allow users to access and enable experimental features, settings, and options that are still in the development or testing phase. They provide users with the ability to customize and enhance their browsing experience in ways that may not be available through standard browser settings.
Here’s more about what Chrome Flags are and their key characteristics:
Experimental Features: Chrome Flags give users access to features and functionalities that are not yet officially released or enabled by default in the Chrome browser. These features are often being tested for performance, stability, and user feedback.
Advanced Customization: Users can enable or disable specific Chrome Flags to tailor their browsing experience to their preferences. These flags cover a wide range of browser capabilities, including performance improvements, user interface changes, security enhancements, and more.
Access via chrome://flags: To access Chrome Flags, users simply need to type “chrome://flags” in the address bar of their Chrome browser and press Enter. This opens the Chrome Flags settings page, where they can browse and modify the available flags.
Caution Required: While Chrome Flags offer advanced customization options, they come with a caveat. Since they are experimental and not fully tested, enabling certain flags can lead to browser instability, compatibility issues with websites, or even security risks. Therefore, users should exercise caution when enabling flags and be prepared to disable them if problems arise.
Regular Updates: The list of available Chrome Flags can change with browser updates. Some flags may be deprecated, while new ones may be introduced. Users should stay informed about these changes to ensure a smooth browsing experience.
Not for Casual Users: Chrome Flags are primarily intended for advanced users, developers, and enthusiasts who are willing to explore and experiment with new browser features. Casual users may not need to access or modify these settings.
Chrome Flags are hidden experimental settings in the Google Chrome browser that allow users to access and enable advanced features and customisations. While they can improve the browsing experience, users should exercise caution when using them and be aware of the potential risks associated with enabling experimental features.
Where are the Chrome Flags?
Chrome flags are located on a hidden page called the Chrome flags page. To access the Chrome flags page, open Chrome and type chrome://flags in the address bar. This will open a page where you can browse through a list of all available flags.
You can also access the Chrome flags page by going to the following menu:
Chrome > Settings > Advanced > About Chrome
Under the About Chrome section, click the Flags link. This will open the Chrome flags page.
It is important to note that Chrome flags are experimental features and may not work as expected. It is also important to back up your Chrome settings before enabling any flags, so that you can restore them if necessary.
To access Chrome Flags in the Google Chrome web browser, follow these steps:
Open Google Chrome: Launch the Google Chrome browser on your computer.
Type the Chrome Flags URL: In the address bar at the top of the browser, type the following URL and press Enter:arduinoCopy codechrome://flags
Access the Chrome Flags page: After pressing Enter, you will be directed to the Chrome Flags settings page.
Browse and search for flags: On the Chrome Flags page, you’ll find a list of experimental features and settings, each represented by a flag. You can scroll through the list to explore available flags or use the search bar at the top to find specific flags by name or keyword.
Enable or disable flags: Next to each flag, there’s a dropdown menu that allows you to select different options like “Default,” “Enabled,” or “Disabled.” To activate a flag, select “Enabled.” To deactivate it, choose “Disabled.”
Relaunch Chrome: After enabling or disabling flags, you will often need to relaunch Google Chrome for the changes to take effect. A button prompting you to relaunch the browser typically appears at the bottom of the Chrome Flags page.
Confirm changes: Once you relaunch Chrome, the selected flags will be active, and you can start using the experimental features or settings you’ve enabled.
It’s important to note that Chrome Flags are experimental and may impact the stability or performance of your browser. Therefore, it’s advisable to use them with caution and only enable flags that you understand and believe will benefit your browsing experience. If you encounter any issues, you can return to the Chrome Flags page and revert the flags to their default settings or disable them.
How do I find which Flags are enabled?
To check which Chrome Flags are currently enabled in the Google Chrome web browser, you can follow these steps:
Open Google Chrome: Launch Google Chrome on your computer.
Type the Chrome Flags URL: In the address bar at the top of the browser, type the following URL and press Enter:arduinoCopy codechrome://flags
Access the Chrome Flags page: You will be directed to the Chrome Flags settings page.
Review enabled flags: On the Chrome Flags page, flags that are currently enabled will be highlighted with a blue “Enabled” label or a similar indicator next to each flag. You can scroll through the list to see which flags have been activated.
Search for specific flags: If you are looking for a particular flag or want to confirm the status of a specific one, you can use the search bar at the top of the Chrome Flags page. Enter the name or keyword related to the flag you’re interested in, and it will be highlighted if enabled.
Disabled flags: Flags that are not enabled will either display “Default” or “Disabled” in the dropdown menu next to them, indicating that they are using the default browser settings.
Relaunch Chrome: Keep in mind that some flag changes may require you to relaunch Google Chrome for the modifications to take effect.
By following these steps, you can easily check which Chrome Flags are currently enabled in your Chrome browser and review their status. Remember to use Chrome Flags cautiously, as enabling certain flags may affect browser stability and performance. If you encounter any issues, you can always return to the Chrome Flags page to disable or reset flags to their default settings.
There are two ways to find which Chrome flags are enabled:
Check the Chrome flags page: Open Chrome and type chrome://flags in the address bar. This will open the Chrome flags page, where you can see a list of all available flags, including their current status (Enabled or Disabled).
Check the Chrome command line: Open a command prompt and type the following command:
chrome --list-flags
This will display a list of all enabled Chrome flags in the command prompt.
You can also search for specific flags on the Chrome flags page or in the command line output.
Here are some examples:
To search for the flag #enable-tab-grid-layout on the Chrome flags page, type tab grid layout in the search bar at the top of the page.
To search for the flag #enable-tab-grid-layout in the command line output, type the following command:
grep "enable-tab-grid-layout" chrome://flags
This will return a line of output that shows the status of the flag, such as:
You can use the same method to search for other Chrome flags.
It is important to note that Chrome flags are experimental features and may not work as expected. It is also important to back up your Chrome settings before enabling any flags, so that you can restore them if necessary.
How do I reset Flags to default?
You can reset Chrome Flags to their default settings in the Google Chrome web browser by following these steps:
Open Google Chrome: Launch Google Chrome on your computer.
Type the Chrome Flags URL: In the address bar at the top of the browser, type the following URL and press Enter:arduinoCopy codechrome://flags
Access the Chrome Flags page: You will be directed to the Chrome Flags settings page.
Locate the flag to reset: Scroll through the list of flags or use the search bar at the top to find the specific flag you want to reset to its default setting.
Reset the flag: Next to the flag’s name, you’ll see a dropdown menu with options like “Default,” “Enabled,” or “Disabled.” To reset the flag to its default setting, select “Default” from the dropdown menu.
Confirm the reset: After selecting “Default,” a prompt may appear at the bottom of the Chrome Flags page, asking if you want to relaunch the browser to apply the changes. Click the “Relaunch” button to restart Google Chrome.
Relaunch Chrome: Once you’ve relaunched the browser, the selected flag will be reset to its default setting, and any changes you made to that flag will be undone.
Repeat these steps for any other flags you wish to reset to their default configurations. It’s important to note that resetting a flag to its default setting will remove any customizations or changes you made to that flag, reverting it to the browser’s standard behavior.
Resetting flags to default can be useful if you experience issues or instability after enabling certain experimental features. It allows you to return your browser to a more stable state.
There are two ways to reset Chrome flags to default:
Reset individual flags: To reset individual flags, open the Chrome flags page (chrome://flags) and click the Default button next to each flag.
Reset all flags: To reset all flags to their defaults, click the Reset all to default button at the top of the Chrome flags page.
Warning: Resetting all flags to their defaults will disable all of the experimental features that you have enabled.
Here are the steps in more detail:
To reset individual flags:
Open Chrome and type chrome://flags in the address bar.
Find the flag that you want to reset.
Click the Default button next to the flag.
Click Relaunch to apply the changes.
To reset all flags to their defaults:
Open Chrome and type chrome://flags in the address bar.
Click the Reset all to default button at the top of the page.
Click Relaunch to apply the changes.
Please note that resetting Chrome flags to their defaults may cause some features to stop working. If you are experiencing problems after resetting Chrome flags, you can try enabling them one by one to see which flag is causing the problem.
How do I get into Chrome flags?
To get into Chrome flags, open Chrome and type chrome://flags in the address bar. This will open the Chrome flags page, where you can browse through a list of all available flags.
How do I enable dark mode on Chrome for all websites?
To enable dark mode on Chrome for all websites, go to the Chrome flags page and search for #enable-force-dark-mode. Click the dropdown menu next to the flag and select Enabled. Then, click the Relaunch button to restart Chrome.
How do I turn on dark mode in Chrome flags?
To turn on dark mode in Chrome flags, go to the Chrome flags page and search for #enable-dark-mode. Click the dropdown menu next to the flag and select Enabled. Then, click the Relaunch button to restart Chrome.
How do I disable parallel downloading in Chrome flags?
To disable parallel downloading in Chrome flags, go to the Chrome flags page and search for #enable-parallel-downloading. Click the dropdown menu next to the flag and select Disabled. Then, click the Relaunch button to restart Chrome.
Important: Chrome flags are experimental features and may not work as expected. It is important to back up your Chrome settings before enabling any flags, so that you can restore them if necessary.
“CATS Blender Plugin: Powering 3D Modelling, Animation and Game Development in the Blender Ecosystem CATS Blender Plugin”, a robust tool meticulously designed for the Blender software ecosystem. This plugin is meticulously designed to handle the intricacies of 3D model manipulation, with a focus on character models, allowing for seamless animation and game development.
The “CATS Blender Plugin” offers a versatile range of functionalities, allowing users to seamlessly import 3D models of various formats into the Blender environment. From streamlining complex structures to refining skeletal frameworks and weight distributions, this plugin gives creators the ability to delve into animation production and undertake transformative endeavours. For professionals immersed in character modelling and game development, this tool is indispensable. In this article, we embark on a comprehensive exploration of the multifaceted capabilities of the “CATS Blender Plugin”. From addressing common issues to delving into advanced troubleshooting methodologies, we will provide you with the knowledge you need to unlock the full potential of this plugin.
Whether you are a seasoned 3D virtuoso or an aspiring game developer, this article is your ultimate resource for unlocking the power of the CATS Blender Plugin. Unleash the power of the CATS Blender Plugin” to take your 3D modelling, animation and game development projects to new heights.
Converting MMD Models to FBX Using the CATS Blender Plugin and Importing to UnityIn the realm of game development, the task of transferring various models from one software to another is a common undertaking. This article provides a guide on how to utilize the CATS Blender Plugin in Blender to convert MMD (MikuMikuDance) models to the FBX format and subsequently import them into the Unity engine for further development and utilization.
Step 1: Downloading the CATS Plugin and MMD ModelsFirstly, you need to download the CATS Plugin and the MMD model you wish to convert. You can find the CATS Plugin at the following link: https://github.com/absolute-quantum/cats-blender-plugin. Make sure to download a version of the plugin that is compatible with your version of Blender.Similarly, you’ll need to acquire the MMD model. “Moziwu” (https://www.aplaybox.com/) is a common resource site where you can find many officially released models. In this article, we’ll be using a model from “San Qī” as an example.
Step 2: Converting MMD Models to FBX
Open Blender and import the CATS Plugin.
Select the CATS option and click “Import Model.” Choose the downloaded MMD model file (.pmx format).
After import, choose the “Shading” option and wait for the colored preview of the model to render.
Switch to the Modeling workspace, select all options under “Translate,” then click “Separate by Material.”
Finally, click “Fix Model” to perform model fixes and ensure correct material assignment.
Once these steps are completed, your MMD model is ready to be exported in the FBX format.Step 3: Importing to the Unity Engine
Place the exported FBX file and associated textures into a folder for ease of import into Unity.
Open Unity and drag the folder into your project’s assets.
You can directly drag the FBX file into the scene, but due to shader settings, the model might appear unusual. As a workaround, you can initially simulate it using the “unlit texture” shader.
If you intend to achieve a two-dimensional effect, you can utilize the “ExtractMaterials” feature to extract materials.
Create a “Materials” folder and create new materials for the extracted ones, selecting “unlit/Texture” as the shader.
By following these steps, you’ve successfully converted an MMD model from Blender to the FBX format and imported it into the Unity engine. Please note that different models and scenes might require adjustments to fit your specific project’s needs. This article aims to assist you in easing the process of model conversion and game development.
Cats Blender Plugin (0.19.0)
Cats Blender Plugin (0.19.0). A tool designed to shorten steps needed to import and optimize models into VRChat. Compatible models are: MMD, XNALara, …
The blender cats plug-in isn’t working for blender 3.5 and I …
Personally I’ve been downloading eg blender-3.2.2-windows-x64.zip and extracting to a directory. Their discord suggests downloading the …
Some Blender Plugins (Notably CATS) Not Working since
Trying to export this model using CATS on Blender, but I keep ..
No mesh found in cats blender plugin : r/blenderhelp – Reddit
Cats Blender Plugin
A tool designed to shorten steps needed to import and optimize models into VRChat. Compatible models are: MMD, XNALara, Mixamo, Source Engine, Unreal Engine …
GiveMeAllYourCats | creating Cats Blender Plugin
GiveMeAllYourCats. 25 members; 2 posts; $157.3/month. creating Cats Blender Plugin. Become a patron. Home · About. Choose your membership. Recommended.
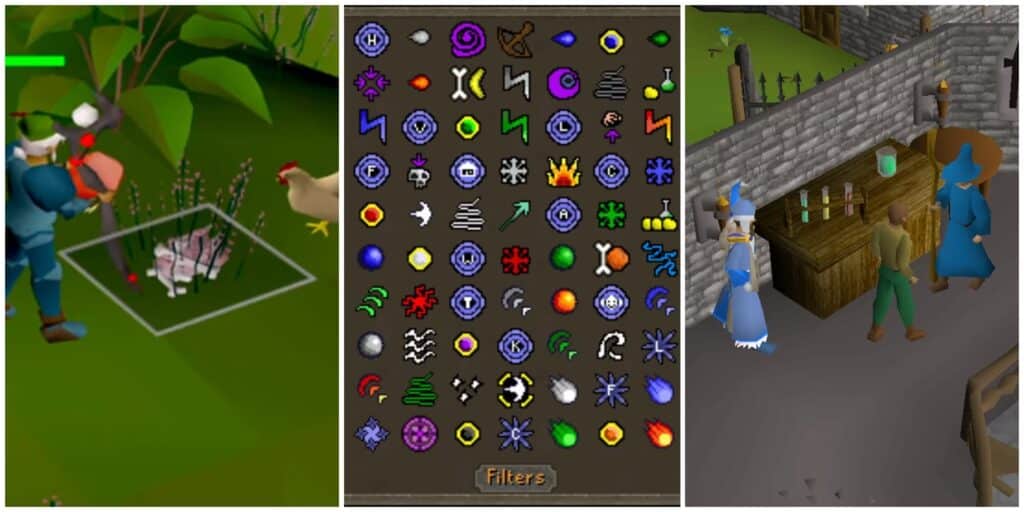
“Runescape” is a highly popular massive multiplayer online role-playing game (MMORPG). The game is developed and published by the British company Jagex. The game’s world is a fantasy realm called Gielinor, where players can explore various regions, undertake quests, battle monsters, and interact with other players.”Runescape” was initially released in 2001 and has undergone numerous updates and improvements.
The game is known for its openness, freedom, and diverse gameplay options, allowing players to develop their characters through a variety of skills and activities. Skills in the game range from combat skills (such as melee and ranged combat) to non-combat skills (such as gathering, crafting, and cooking).In the game, players can collaborate with others, team up for quests and challenges, or engage in various activities like player-vs-player (PvP) combat and player-vs-environment (PvE) activities.
Additionally, the game features an economic system where players can trade items and earn in-game currency.Due to its unique gameplay style and continuous updates, “Runescape” has maintained a strong player community over the past decades. The game has also released different versions, including the older version of “Runescape” and the updated “Runescape 3”. Furthermore, the game has been launched on mobile platforms and various devices, allowing players to enjoy it across a range of devices.
Crafting Stools in Plan Make Old School RuneScape (OSRS)
Here is the information regarding how to craft a stool in the game Old School RuneScape (OSRS).In OSRS, crafting a stool is an activity within the Construction skill. You can create a stool by following these steps:
Obtain Logs: First, you need to acquire logs suitable for crafting a stool. You can obtain logs by using an axe on trees found in the game world. Different types of trees yield different kinds of logs.
Craft Stool Base: Use your logs to craft the base of the stool at a Construction skill workbench. You can find Construction skill workbenches in most towns, such as Varrock, Falador, and others.
Craft Stool Backrest: Attach the backrest to the stool base. This requires a certain Construction skill level, the specific level depending on the type of stool you wish to craft.
Complete the Stool: Once you attach the backrest to the base, you have successfully crafted a stool!
It’s worth noting that crafting different types of stools might require varying Construction skill levels and types of logs. You can unlock more varieties of stool crafting by leveling up your Construction skill in the game.
Plank Make OSRS
The spell Make Plank requires 86 Magic. It turns a tree trunk, which can normally be turned into a plank at the sawmill, into a plank of the same type. There is still a cost per plank – it costs 70% of the coins the sawmill operator would charge. However, this saving is cancelled out by the rune cost of the spell. Therefore, people do not use Plank Make to make money, but rather to train their magic. Plank making is a good way to train magic, and is a faster way to gain experience than high-level alchemy. However, the need to stay in a bank area may make High Level Alchemy more attractive to players who want to train other skills as well as Magic. Plank Make can be cast once every 3 game turns (about 1.8 seconds). Including bank time, up to 1850 Plank Makes can be cast per hour, giving up to 166k Magic experience per hour. Note: This number of casts per hour can be reduced by lag, errors (such as clicking on planks already cast), or distractions.
Log
Plank
Cost in coins
Spell Make
Sawmill
Logs
Plank
70
100
Oak logs
Oak plank
175
250
Teak logs
Teak plank
350
500
Mahogany logs
Mahogany plank
1050
1500
Plank Make
The Plank Make spell requires level 86 Magic and the completion of Dream Mentor. It will convert one log that can normally be converted at the sawmill into …Spellbook: LunarCasting speed: 3 ticks (6 on autocast)?
Casting plank make
The rune cost of Plank Make spell is 192 coins when using a staff to replace earth runes. Logs, Price, Plank, Price, Sawmill fee, Profit/Log.
Mahogany Plank Make Autocast – Magic
Script will autocast Make Plank (slower than active casting) then … less than this: https://oldschool.runescape.wiki/w/Money_making_guide/ …
What’s the best way to make planks? : r/ironscape
What’s the best way to make planks? … Get a servant or just run back and forth in woodcutting guild? … Another option is to go to pvp world and … : If you can afk at work I’d suggest plank make, I made 30k planks last week
If you can afk at work I’d suggest plank make, I made 30k planks last week and got 88-94 mage lol but otherwise you can note your logs and put house in rimmington, give butler logs to bring to sawmill then leave house and go to general store which has a guy named phials who unnotes stuff gp then run back to house and repeat steps. Another option is to go to pvp world and have cammy/house teles, you would tele to cammy to take logs out then tele to house to give to butler and repeat but if doing this make sure to lock house portal to visitors.
Pretty late on this, but maybe it could be a cool suggestion for anyone who sees this… But the new ring from Guardians of the Rift can teleport you to the earth altar, and you could take the hot air balloon back to the crafting guild or castle wars to do it again. Might be other stuff you could add onto that too idk
Nobody ever recommends it, because its not efficient, but I really like teleporting to castle wars to bank, then taking the balloon to the Varrock lumber yard, then tele again; the balloons take 1 willow log per trip and you can store 100 of them at a time with the balloon so you don’t have to grab one each time.Its slower than using a butler but its cheaper (since no butler fees), and its faster than doing plank make.
Lunars Calculator for OSRS – Plank Make
Lunars Calculator for OSRS! Calculate GP/ph, XP/ph and Profits when casting Tan Leather and Make Plank at your own pace.
OSRS: Plank Make
One of the spells you can use in the game is Plank Make, although it requires that you are level 86 in Magic and that you complete Dream Mentor.
There’s no shame in using tools to help you build discipline and get things done. This is where today’s list of apps shine:
Timemator
(worth $39) Get it for $3.5
Timemator automatically captures everything you do on your Mac. You can go back to review what you were working on and with just a few clicks, assign the time to your projects.
McPlanner MindMap
(worth $29) Get it for $3
mcPlanner MindMap is your ideal partner for brainstorming new ideas which can be brought to life on mind maps that resemble the informational structure of your brain using text, shapes, and images.
Hummingbird
(worth $9) Get it for $3
Hummingbird fixes window dragging in Big Sur. Drag or resize windows from anywhere, just by holding a shortcut key.
2Remember
(worth $9.95) Get it for $2
Easy to use Mac reminder app. Takes up a tiny space on your screen but has numerous options for ToDos including flashing icon on dock, flashing tab red, alert and sound.
In May of this year, the outbreak of the epidemic in Taiwan was completely shut down and all outdoor sports were shut down. Fortunately, with the concerted efforts of all the people of Taiwan, the epidemic gradually subsided after half a year. All the bans were lifted and all kinds of outdoor sports slowly returned to normal.
The epidemic is slowing down Bryton also released the new flagship S500 on 12/01 The S series is designed for riders who focus on performance and training or competition. The main focus is on “more advanced” data analysis This new flagship is a little smaller than the 750 screens at 2.4 inches The hardware has been upgraded to make the touch screen and all operations more responsive The light sensor is added to adjust the brightness of the screen with the ambient light
The official data of power consumption is 24 hours (20 hours for 750) However, I heard that the actual test data is better, It is only considering the different usage conditions and accessories of each person. Many considerations decided to write a more conservative endurance, So finally settled on the official data of 24 hours Standard equipment Main unit. Charging cable. Aluminum dock. Simple dock. Two different high and low meter seat spacers. Anti-jumping cord In line with the recent trend of USB Type-C phones, the charging cable is USB Type-C for added convenience. S500 will come with a protective case as standard after its launch Manual Front and back] The small round hole on the front is the new light sensor On the back, you can see that there are four more screws on the latches, which are designed for easy replacement after wear and tear. On the other hand, the future will be introduced in the form of accessories to support Garmin’s latches to facilitate users to replace the use Front, back, and side buttons The key arrangement and function is the same as 750 Press four keys at the same time to restart the device Official S500 specification information Boot up】=>【Select language】=>Scan QR Code to download Active APP=>Operating interface is the same as 750 [Take a photo with 750]. Did you notice that the battery % is back and it’s more convenient than 860 on the main screen? Bryton has heard the voice of the user The digital display is also similar to the 750 Compare it to the 420. Almost identical in appearance, just a little fatter
Main unit. Charging cable. Aluminum dock. Simple dock. Two different high and low meter seat spacer. Anti-jumping cord In line with the recent trend of USB Type-C phones, the charging cable is USB Type-C for added convenience. S500 will come with a protective case as standard after its launch
Manual Front and back] The small round hole on the front is the new light sensor On the back, you can see that there are four more screws on the latches, which are designed for easy replacement after wear and tear. On the other hand, the future will be introduced in the form of accessories to support Garmin’s latches to facilitate users to replace the use Front, back and side buttons
Front, back and side buttons The key arrangement and function is the same as 750 Press four keys at the same time to restart the device
Official S500 specification information
【 Boot up】=>【Select language】=>Scan QR Code to download Active APP=>Operating interface is the same as 750
[Take a photo with 750]. Did you notice that the battery % is back and it’s more convenient than 860 on the main screen? Bryton has heard the voice of the user
The digital display is also similar to the 750
Compare it to the 420. Almost identical in appearance, just a little fatter.
There are two types of A.B. below 7 frames, and only one type above 8 frames. 10 frames at most. [Open Active] => [Matching]
Also has a day. Night display mode Left (Night) Middle (Day) can be switched automatically by the auto function With the automatic light sensor backlight setting, it should save a lot of power over long distances. The picture (right) shows the same as the 750, only smaller
The official promotion adds features to the Live Track Real-Time Sharing With the new Bryton Live Track feature, you can share your ride status and location with your family and friends in real-time! The Bryton Active App makes it easy to create links and share them quickly with communication and social software, allowing family, friends, and coaches to track your progress instantly through the webpage. The page not only shows your ride track and real-time location, but also provides speed, ride time, total ride time, and distance.
Climb Challenge hill information The Rider S500’s new Climb Challenge hill information feature will take you to new riding heights! Simply import your route into the Bryton Active App, and Bryton will automatically create the climb information in it. When riding on a planned route, the Rider S500 will provide information about upcoming climbs before the start of the climb, including graphical display of the climb information, color-coded gradient, climb distance, elevation, climbing, and the start of the climb. The new interface training schedule
New interface training schedule Professional training, new interface With the Bryton Active and Rider S500, users can quickly create structured schedules and integrate TrainingPeaks, including training notes that can be displayed on the watch, for more flexible training schedule adjustments. In training mode, the Rider S500 displays training steps graphically and supports on-device zooming. This is a powerful aid for power training.
Customized quick information page Highlights at your fingertips The Rider S500’s innovative and unique customizable Quick Info page allows users to keep track of key data at all times, providing three combinations of lap data, optional data grid, and sensor status, allowing you to grasp key information at a glance with a single click.
Built-in automatic light sensor The Rider S500 has a built-in light sensor that adjusts the screen brightness according to the ambient light. Whether riding indoors, through a tunnel, or in the shade, the screen backlight automatically adjusts for the clearest and most comfortable display.
What interests me most about the S500 is the new light sensor. The Climb Challenge slope reminder is a pity that you have to import the path first. But even so, if you want to go to a route that you have not done before or are not familiar with Planning on the map first and then importing is still somewhat useful The incline meter only appears when you use the navigation, so I’ll add it when I’m out on the trail.
First of all, let’s open the box briefly and feel out the functions Light sensor and touch smoothness to be used in practice will be added to the use of experience
The S500 is undoubtedly the fastest and smoothest chronograph in Bryton. I hope the actual road will have better performance


")
.jpg)
.jpg)


.jpg")


 (無論是挖礦/點擊廣告/看新聞/看影片)


 McPlanner MindMap
  Rocket Typist


.png")
.png")
.png")
.png")
.png")
.png")
.png")
.png")
.png")
.png")
.png")

.png")
.png")